
Prilixor

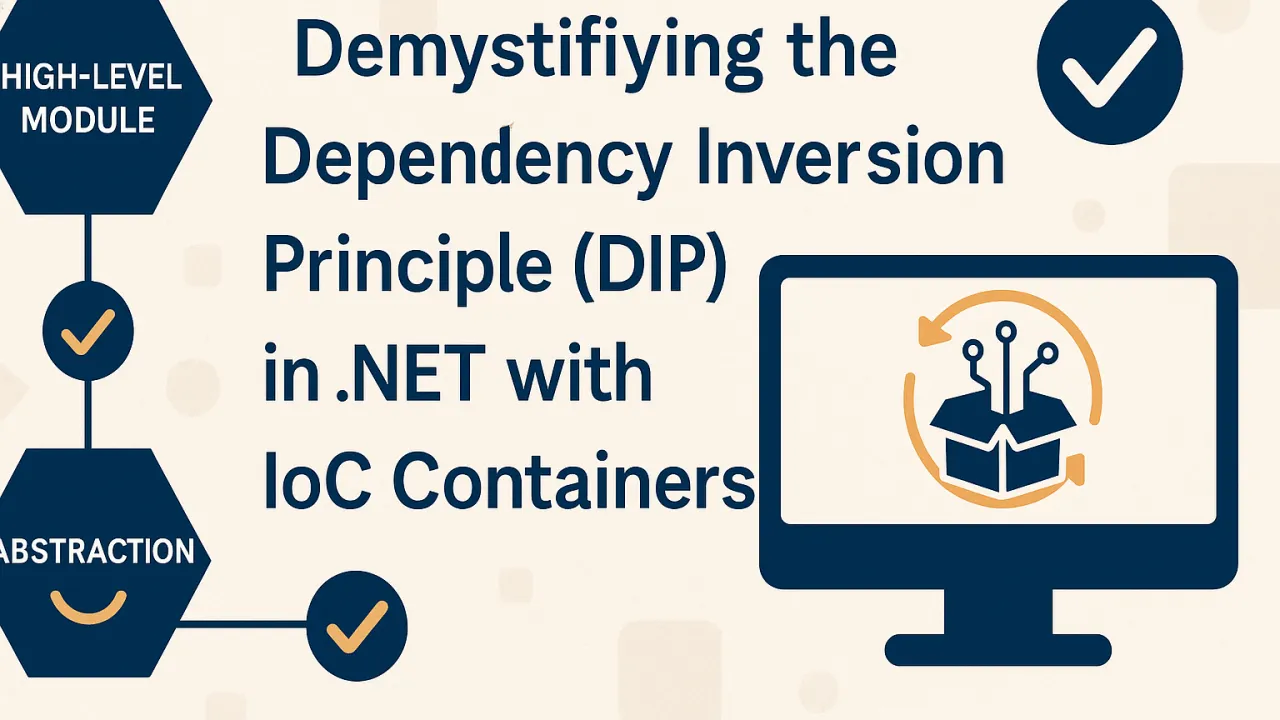
Demystifying the Dependency Inversion Principle (DIP) in .NET with IoC Containers

In modern .NET development, creating software that is flexible, testable, and easy to maintain is more important than ever. As applications evolve, tightly coupled components can quickly become a barrier to adding new features, scaling systems, or improving performance.

This is where the Dependency Inversion Principle (DIP) steps in — offering a clear strategy for building loosely coupled, future-proof applications. When combined with Inversion of Control (IoC) containers, DIP becomes far more than a design principle; it becomes a practical, everyday part of clean architecture.

Understanding the Dependency Inversion Principle

At its core, DIP guides developers to follow two key ideas:

1. High-level modules should not depend on low-level modules.

Both should depend on abstractions, not concrete implementations.

2. Abstractions should not depend on details.

Details (implementations) should depend on abstractions.

In simpler terms, instead of components depending on each other directly, they interact through well-defined contracts. This structure keeps the system resilient to change and encourages a modular, maintainable architecture.

Why DIP Matters in .NET Applications

In a typical application, core components often rely on specific classes, services, or data sources. When these dependencies are tightly coupled:

  • Replacing or updating functionality becomes risky
  • Testing individual components becomes difficult
  • Code becomes harder to extend
  • Maintenance effort increases significantly

By adopting DIP, we achieve:

Better Testability

Components can be tested independently by substituting real implementations with lightweight alternatives.

Reduced Coupling

Business logic remains isolated from technical details like data access, logging, or external services.

Greater Flexibility

Features can be replaced or extended without breaking existing functionality.

Cleaner Architecture

The system naturally aligns with layered or onion architecture patterns.

The Role of IoC Containers

While DIP defines the principle, Inversion of Control (IoC) containers make it practical. IoC containers automatically:

  • Instantiate components
  • Inject their dependencies
  • Manage object lifetimes
  • Resolve services only when needed

In .NET projects, IoC containers help enforce DIP seamlessly and consistently across the entire application.

Popular IoC containers include:

  • Microsoft.Extensions.DependencyInjection

The built-in .NET dependency injection framework — simple, lightweight, and ideal for most applications.

  • Autofac

A powerful, feature-rich container ideal for more complex dependency graphs or advanced scenarios.

  • • Others like Ninject, StructureMap, Castle Windsor

Used in specific architectures depending on project needs.

IoC containers help ensure components depend only on abstractions — the container handles wiring the concrete implementations behind the scenes.

How IoC Containers Bring DIP to Life

IoC containers allow developers to:

1. Register abstractions and implementations

You define what service is used for what contract, without any class knowing the underlying details.

2. Automatically resolve dependencies

Instead of manually creating objects, constructors request abstractions and the container supplies the right implementation.

3. Control object lifetime

Singleton, scoped, transient — IoC containers manage how instances are created and reused.

4. Simplify unit testing

Mocks or test implementations can be swapped in easily through dependency registration.

5. Improve application structure

Startup configurations clearly define the system’s wiring, making architecture transparent and cleaner.

With IoC, DIP becomes not just a concept, but a practical, enforceable part of .NET development.

DIP + IoC = Clean, Scalable Architecture

When DIP is combined with IoC containers, the result is a clean, modular application design characterized by:

  • • Clear separation of concerns

Business logic doesn’t know — or care — how dependencies work internally.

  • • Plug-and-play components

New services or implementations can be added without modifying existing code.

  • • Enhanced testability

Components rely on abstractions, making it easy to inject mock versions for testing.

  • • Maintainable growth

As the application expands, the architecture remains stable and manageable.

Final Thoughts

The Dependency Inversion Principle is one of the most transformative ideas in software architecture — especially for .NET developers building modern, scalable applications. When supported by IoC containers like Microsoft.Extensions.DependencyInjection or Autofac, DIP creates systems that are not only easier to test and maintain but also ready to adapt to future business needs.

Following DIP isn't about writing more code — it's about writing better-structured code that makes your application stronger, cleaner, and more resilient in the long run.


SOLID Principles: The Foundation for Maintainable .NET Code

In the world of software development, flexibility and long-term maintainability matter just as much as delivering features quickly. For .NET developers, the SOLID principles act as a trusted blueprint for writing clean, structured, and scalable code that can evolve without breaking.

These five principles — Single Responsibility, Open/Closed, Liskov Substitution, Interface Segregation, and Dependency Inversion — help ensure that software systems remain robust, adaptable, and easy to test, regardless of their size or complexity.

Why SOLID Matters

Modern applications grow fast. New features are added, teams expand, and technology shifts. Without a strong architectural foundation, software becomes rigid, difficult to change, and expensive to maintain.

SOLID principles help teams:

  • Reduce complexity
  • Avoid tightly coupled modules
  • Improve testability
  • Support faster feature development
  • Ensure long-term code quality and resilience

SOLID is not just about good engineering — it’s about designing software that can support business needs over time.

The Five SOLID Principles — Explained Simply

1. Single Responsibility Principle (SRP)

Every component should focus on one job. This keeps code easier to understand, test, and update when requirements change.

2. Open/Closed Principle (OCP)

Systems should allow extension without requiring modification of existing, stable code. This encourages plugging in new behaviors while preserving what already works.

3. Liskov Substitution Principle (LSP)

Any derived component should behave consistently with what consumers expect. It ensures predictability and prevents unexpected runtime issues.

4. Interface Segregation Principle (ISP)

Clients should depend only on what they need. Smaller, purpose-driven interfaces enable more focused, maintainable components.

5. Dependency Inversion Principle (DIP)

High-level logic should not depend on details. Both should rely on shared abstractions. This principle enables cleaner architecture and easy testing through dependency injection.

How SOLID Transforms .NET Development

By applying SOLID, teams gain:

Cleaner Architecture

Systems become modular, organized, and intuitive to navigate.

Enhanced Scalability

Features can be added without refactoring core foundations.

Better Test Coverage

Small, well-isolated components are easier to mock and validate.

Reduced Technical Debt

Less rewriting. Less patching. More stability.

Efficient Collaboration

Developers can work in parallel with fewer merge conflicts and dependencies.

A Principle-Driven Path to Better Software

SOLID isn’t just a checklist — it’s a mindset. The more consistently teams follow these principles, the more robust their applications become. Whether you're architecting enterprise-level systems or building modern cloud-native solutions in .NET, SOLID provides a timeless, battle-tested approach that leads to long-lasting software quality.

Unit Testing Angular Components: Ensuring Robust and Maintainable Frontends

In today’s fast-paced digital landscape, users expect web applications that are not only visually appealing but also stable, predictable, and scalable. For teams building with Angular, unit testing plays a vital role in ensuring that components, services, and pipes behave as intended — long before they reach the browser.

A well-designed testing strategy doesn’t just catch defects; it creates confidence, accelerates development, and lays the foundation for a maintainable frontend architecture.

Why Unit Testing Matters in Angular

Angular encourages a modular structure, where components interact with services, pipes, and external dependencies. Without proper test coverage, small changes in one area can cause ripple effects throughout the application.

Effective unit testing helps teams:

Prevent unexpected regressions

Well-written tests quickly reveal when an update breaks existing functionality.

Improve development speed

Developers spend less time debugging and more time building features.

Encourage cleaner, testable code

Writing tests encourages patterns like dependency injection, separation of concerns, and reusable logic.

Increase long-term maintainability

A robust test suite acts as documentation, helping new developers understand expected behavior.

Core Areas of Angular Unit Testing

1. Component Testing: Behavior Over Implementation

Angular components are the backbone of UI interaction. Component tests evaluate how the component responds to inputs, user actions, and lifecycle events.

The focus should be on:

  • Correct rendering of UI based on inputs
  • Proper interaction handling (clicks, events, data updates)
  • Communication with child components or services
  • Guarding against accidental logic changes

The goal is not to test the framework but to validate your component’s responsibilities.

2. Service Testing: Ensuring Consistency of Business Logic

Services carry the business rules, calculations, and data management that support the UI.

Strong service tests validate:

  • Data transformation logic
  • API call handling (mocked)
  • Error scenarios and fallbacks
  • State management

Mocking external requests and dependencies ensures the tests are fast, predictable, and independent of external systems.

3. Pipe Testing: Small but Crucial

Pipes often seem trivial, but one incorrect transformation can break a part of the UI or produce confusing outputs for users.

Pipe tests help confirm:

  • Input/output correctness
  • Edge case handling
  • Behavior under null/undefined scenarios

Since pipes are pure functions in most cases, they are among the simplest yet most valuable units to test.

Mocking Dependencies: A Key to Effective Testing

Angular applications frequently rely on external services, APIs, and shared modules. Directly using them in tests leads to:

  • Slow test execution
  • Flaky, unpredictable results
  • Difficulty isolating the unit under test

Mocking dependencies allows you to:

  • Control the data returned
  • Test how your unit reacts to success and error paths
  • Keep tests focused on logic, not networking

This approach is crucial for achieving reliable and maintainable test suites.

Designing Testable Angular Code

High-quality tests begin with high-quality architecture. Testable code typically follows these principles:

Clear separation of concerns

Components handle UI; services handle logic.

Dependency injection over hard-coded instances

Angular’s DI system makes mocking easier and promotes modular design.

Small, reusable functions

Helps isolate logic for simpler testing.

Avoiding side effects

Predictability leads to stable tests.

By integrating these principles into development, testing becomes a natural extension of the process rather than an afterthought.

Achieving High Code Coverage Without Compromise

While code coverage is not the only metric that matters, it provides valuable insight into how much of your application is verified by tests.

A practical approach to high coverage includes:

  • Testing all logic branches (success, failure, edge cases)
  • Covering UI behaviors in components
  • Ensuring services and pipes are thoroughly validated
  • Avoiding unnecessary tests for framework internals

The goal should be meaningful coverage — not just numbers.

The Business Value of Strong Angular Unit Testing

Organizations that invest in unit testing gain measurable benefits:

Lower development and maintenance costs

Fewer bugs reach production, and fixes are easier to implement.

Faster releases with greater confidence

Teams ship versions knowing critical flows are backed by automated checks.

Improved collaboration and onboarding

Tests act as “living documentation” for future developers.

Better user experience and brand trust

Stable applications lead to higher satisfaction and retention.

Conclusion

Unit testing is more than a technical requirement — it’s a strategic investment in the future of any Angular application. By focusing on component behavior, reliable mock-driven service tests, and clear coding patterns, teams can build robust, scalable, and maintainable frontends that stand the test of time.

In a world where digital performance drives business success, a strong foundation in testing is not just recommended — it’s essential.

Angular and ASP.NET Core Integration: Best Practices for Full-Stack Development

The combination of Angular and ASP.NET Core has become a go-to stack for building scalable, secure, and high-performing full-stack applications. Angular offers a powerful front-end framework for building rich, dynamic user interfaces, while ASP.NET Core provides a robust, cross-platform backend for APIs, authentication, and business logic.

When properly integrated, these two technologies deliver a unified development experience, where the frontend and backend communicate seamlessly and evolve together. Let’s explore the key practices that ensure your Angular + ASP.NET Core applications remain clean, secure, and production-ready.

1. Architect with Clear Separation of Concerns

One of the biggest advantages of Angular and ASP.NET Core is the ability to separate frontend and backend development while maintaining tight integration.

Best Practices

  • Keep Angular and ASP.NET Core projects independent. Host them together for deployment, but develop them separately for cleaner architecture.
  • Use ASP.NET Core Web APIs purely for data and business logic, keeping presentation logic entirely in Angular.
  • Adopt a modular Angular structure (feature modules, shared modules) and a layered backend architecture (Controllers → Services → Repositories).

Why it matters: This separation improves maintainability, scalability, and enables teams to work in parallel efficiently.

2. Build Secure Authentication and Authorization Flows

Security is a top concern in full-stack development. When integrating Angular with ASP.NET Core, using token-based authentication ensures a stateless, scalable model.

Recommended Approach

  • Use JWT (JSON Web Tokens) for stateless authentication. ASP.NET Core can issue tokens using the built-in Microsoft.AspNetCore.Authentication.JwtBearer middleware.
  • Store tokens securely in Angular using HttpOnly cookies or secure storage (never localStorage for sensitive data).
  • Implement Role-Based Access Control (RBAC) on both sides — use ASP.NET Core’s policies and Angular guards to enforce authorization rules.

Why it matters: Centralizing authentication in the backend and enforcing role-based permissions in the frontend prevents unauthorized access and improves user trust.

3. Optimize API Communication Between Angular and ASP.NET Core

Efficient communication between the frontend and backend is key to maintaining performance and reliability.

Best Practices

  • Use Angular’s HttpClient for clean, consistent API calls.
  • Implement environment-based configuration (e.g., different API URLs for development, staging, and production).
  • Leverage interceptors in Angular for common logic — such as attaching auth tokens, handling errors, or logging requests.
  • Optimize API payloads — return only necessary data and use pagination for large datasets.

Pro Tip: Enable CORS (Cross-Origin Resource Sharing) in ASP.NET Core using the app.UseCors() middleware to safely handle cross-domain requests from your Angular app.

4. Share DTOs Between Frontend and Backend

To maintain consistency between Angular and ASP.NET Core, you can share Data Transfer Objects (DTOs) or models.

Recommended Techniques

  • Use TypeScript interfaces that mirror your C# DTOs. You can generate them automatically using tools like:
  • Keep these DTOs versioned and well-documented to ensure compatibility across API updates.
  • Validate data on both sides — ASP.NET Core with Data Annotations and Angular with Reactive Form Validators.

Why it matters: Shared DTOs prevent mismatched structures, reduce runtime bugs, and keep the entire stack strongly typed.

5. Streamline Deployment and Hosting

ASP.NET Core can easily host Angular applications, simplifying deployment and maintenance.

Best Practices

  • Use the Angular CLI build command (ng build –configuration production) to generate optimized frontend bundles.
  • Place the Angular build output inside ASP.NET Core’s wwwroot directory for unified hosting.
  • Use Reverse Proxy or API Gateway if deploying Angular and ASP.NET Core separately.
  • Automate CI/CD pipelines (using GitHub Actions, Azure DevOps, or Jenkins) for consistent builds, testing, and deployment.

Why it matters: Unified deployment minimizes infrastructure overhead and simplifies version management.

6. Optimize Performance Across the Stack

Both Angular and ASP.NET Core offer advanced tools to ensure high performance.

On the Angular side:

  • Use lazy loading for modules.
  • Implement AOT compilation and tree shaking to reduce bundle size.
  • Minimize change detection overhead with OnPush strategy.

On the ASP.NET Core side:

  • Enable response caching and compression.
  • Use asynchronous controllers for non-blocking I/O.
  • Optimize database queries with proper indexing and pagination.

Why it matters: Performance optimization ensures smooth user experience and reduces infrastructure costs.

7. Logging, Monitoring, and Error Handling

A production-ready full-stack app needs centralized monitoring.

Angular-side

  • Implement a global error handler for catching runtime errors.
  • Integrate with monitoring tools like Sentry or Azure Application Insights for client-side logging.

ASP.NET Core-side

  • Use structured logging with Serilog or NLog.
  • Log API exceptions and request data for traceability.
  • Set up Application Insights for full-stack telemetry (both client and server).

Why it matters: Observability is the backbone of scalability and reliability in enterprise systems.

8. CI/CD Integration and Versioning

  • Integrate automated build and deployment pipelines for both frontend and backend.
  • Version your APIs and Angular services to avoid breaking existing clients.
  • Include automated unit and integration tests using:

Why it matters: Continuous integration ensures quality, reduces manual errors, and accelerates delivery.

Conclusion

The integration of Angular and ASP.NET Core creates a modern, scalable, and maintainable full-stack environment that aligns perfectly with enterprise needs.

  • Angular provides an elegant, reactive frontend.
  • ASP.NET Core delivers secure, performant, and cross-platform APIs.
  • Together, they offer a unified development model, combining productivity, security, and scalability.

By following these best practices — from modular architecture and secure JWT flows to shared DTOs and CI/CD automation — teams can deliver high-performing, cohesive applications that scale effortlessly and stand the test of time.

Optimizing Angular Performance: Tips and Tricks for Faster Web Apps

In today’s fast-paced digital world, performance is a feature. No matter how powerful your Angular application is, users expect lightning-fast experiences — and even minor lags can impact engagement, conversions, and overall satisfaction.

The good news? Angular, by design, provides all the tools you need to build high-performance applications — you just need to use them wisely.

This guide explores practical, battle-tested techniques to help you make your Angular apps faster, leaner, and more efficient without compromising functionality.

1. Strategic Lazy Loading — Load Only What You Need

Lazy loading is one of Angular’s most impactful optimization techniques. It allows your application to load modules only when they’re needed, rather than bundling everything upfront.

When implemented correctly, lazy loading can dramatically reduce initial load times — especially in large enterprise apps with many routes.

Best Practices

  • Split your app into feature modules and configure them for lazy loading via the router.
  • Keep the main bundle minimal — avoid putting large dependencies or infrequently used features in the root module.
  • Monitor module sizes using Angular CLI’s built-in bundle analyzer (ng build –stats-json).

Why it matters: The smaller your initial bundle, the faster your first paint — improving both user experience and Core Web Vitals.

2. Optimize Change Detection — Don’t Recalculate What Hasn’t Changed

Angular’s default Change Detection strategy (Default mode) checks every component tree whenever an event occurs — which can slow down large apps with complex hierarchies.

Switching to ChangeDetectionStrategy.OnPush tells Angular to update a component only when its inputs actually change, drastically reducing the work performed per tick.

Best Practices

  • Use OnPush for components with immutable data or clearly defined inputs.
  • Leverage pure pipes instead of recalculating data repeatedly in templates.
  • Avoid unnecessary two-way bindings; use unidirectional data flow wherever possible.
  • Use Angular’s TrackBy function in *ngFor loops to prevent full DOM re-rendering.

Why it matters: Smarter change detection means smoother rendering and reduced CPU usage, especially on mobile devices.

3. Enable Ahead-of-Time (AOT) Compilation

Angular’s AOT compilation converts TypeScript and HTML templates into JavaScript during the build phase — instead of at runtime. This results in smaller bundles, faster startup times, and early detection of template errors.

Best Practices

  • Always enable AOT for production builds (it’s on by default in recent Angular versions).
  • Combine it with build optimizations: ng build –configuration production automatically enables AOT, minification, and tree-shaking.
  • Fix any AOT errors early — they often highlight structural or template issues you’d miss otherwise.

Why it matters: AOT reduces the parsing and compilation work the browser has to do, making your app load and run faster.

4. Leverage Tree Shaking for Smaller Bundles

Tree shaking removes unused code from your final build — reducing bundle size and improving load times. Angular and Webpack handle this automatically in production builds, but poor module organization or unused imports can still bloat your app.

Best Practices

  • Import only what you need from libraries — avoid import * statements.
  • Remove unused services, pipes, and components from your codebase.
  • Use lightweight libraries or native browser APIs whenever possible.
  • Analyze your build output using tools like Webpack Bundle Analyzer or Source Map Explorer to identify heavy dependencies.

Why it matters: Every kilobyte counts. Smaller bundles lead to faster downloads and quicker interactivity.

5. Optimize Images and Static Assets

Even the best JavaScript optimizations can’t overcome unoptimized images. Large images and heavy assets are among the top causes of slow Angular apps.

Best Practices

  • Use modern image formats like WebP or AVIF.
  • Compress assets without noticeable quality loss using tools like ImageOptim or TinyPNG.
  • Serve appropriately sized images for each device (responsive images).
  • Use Angular’s asset caching and lazy loading for large visuals or icons.

Why it matters: Reducing asset weight improves load time and boosts Lighthouse scores dramatically.

6. Minimize Change Triggers and Event Handlers

Angular applications can become sluggish when excessive DOM events trigger unnecessary re-renders.

Best Practices

  • Use debouncing or throttling for rapid event handlers like scrolls, inputs, and resizes.
  • Avoid using heavy computations directly in template bindings — move logic into getters or RxJS operators.
  • Unsubscribe from observables when components are destroyed to avoid memory leaks.

Why it matters: Keeping the change detection cycle lean ensures better responsiveness and reduces the risk of performance degradation over time.

7. Use On-Demand Module Preloading

Preloading is a smart optimization that loads lazy modules in the background after the main app has initialized.

Angular’s built-in PreloadAllModules strategy ensures that while users interact with your app, additional modules load silently — improving perceived performance.

Why it matters: Preloading combines the benefits of lazy loading and readiness, ensuring users never face delays navigating to secondary modules.

8. Cache Smartly with Service Workers

For repeat visitors, Service Workers (via Angular’s @angular/pwa package) allow your app to cache key assets and API responses for offline use and faster reloads.

Benefits:

  • Faster subsequent visits by caching static assets.
  • Seamless offline functionality.
  • Reduced network requests and bandwidth usage.

Why it matters: PWAs powered by Service Workers deliver app-like performance and reliability even in poor network conditions.

9. Monitor, Audit, and Continuously Improve

Performance optimization isn’t a one-time effort — it’s a process. Angular provides several tools to measure and monitor app performance.

Tools and Techniques

  • Lighthouse for real-world metrics like First Contentful Paint (FCP) and Time to Interactive (TTI).
  • Angular DevTools for profiling change detection cycles.
  • Chrome Performance Panel for spotting heavy scripts and render-blocking resources.
  • WebPageTest for network-level insights and global performance reports.

Why it matters: Data-driven optimization helps you target real bottlenecks, not assumptions.

10. The Mindset: Build with Performance in Mind

Performance isn’t something you “add” later — it’s a mindset baked into every development decision.

Keep your architecture modular, your dependencies minimal, and your components efficient. Angular gives you the tools; it’s up to you to use them thoughtfully.

By combining lazy loading, OnPush detection, AOT, tree-shaking, and caching, you’ll deliver applications that feel instant — no matter how complex the logic behind them.

Conclusion

Optimizing Angular performance isn’t about chasing microseconds — it’s about delivering smooth, reliable, and delightful user experiences.

By mastering these core techniques — from lazy loading and change detection strategies to smart caching and AOT compilation — you can ensure your Angular app performs beautifully, scales effortlessly, and keeps users engaged.

In enterprise environments or consumer-facing products, these optimizations don’t just enhance UX — they define success.

State Management in Angular: NgRx vs. Akita vs. Services — A Practical Guide

As Angular applications scale in size and complexity, managing state — the data that defines the user interface and drives application logic — becomes a critical challenge. While Angular Services work well for smaller applications, large enterprise systems require more structured and predictable solutions like NgRx or Akita.

This guide compares these three popular approaches — NgRx, Akita, and Angular’s native Services — helping you understand their trade-offs and decide which one fits your project best.

1. The Role of State Management

In a simple application, managing data is straightforward — a few components share information through services or inputs and outputs. But as your app grows, multiple modules, asynchronous operations, and user interactions make managing state more complicated.

Without a proper strategy, developers often face issues like:

  • Data inconsistencies between components.
  • Hard-to-debug asynchronous updates.
  • Overlapping logic spread across multiple services.
  • Difficulty tracking what changed, when, and why.

That’s why Angular developers turn to formal state management solutions — to simplify complexity, improve predictability, and keep applications maintainable at scale.

2. Angular Services — Simple and Direct

Angular Services are the simplest way to share and manage state between components. They use dependency injection, which allows any component to access the same data instance.

You can store application state as class properties and share updates using observables, such as BehaviorSubject or ReplaySubject.

When to Use Services

  • For small to medium projects.
  • When only a few components need to share data.
  • When performance and minimal overhead are top priorities.
  • For UI-specific or feature-level state that doesn’t need global management.

Strengths

  • Simplicity: Easy to understand and quick to implement.
  • No Dependencies: Works with built-in Angular tools.
  • Lightweight: Ideal for performance-sensitive applications.
  • Full Control: You decide how and when the state updates.

Limitations

  • Scalability Issues: As complexity grows, keeping track of all state changes becomes difficult.
  • Unstructured: No enforced pattern for handling state transitions.
  • Debugging Difficulty: Hard to trace updates across multiple services and components.

In short: Angular Services are perfect for small applications or local feature states where simplicity matters more than structure.

3. NgRx — Enterprise-Level Predictability

NgRx is Angular’s most mature and widely adopted state management solution. Based on the Redux pattern, it enforces a unidirectional data flow — actions trigger reducers, which update the state predictably.

NgRx excels in large applications where multiple developers work simultaneously and every state change must be trackable, testable, and auditable.

When to Use NgRx

  • For large, enterprise-grade Angular applications.
  • When multiple teams contribute to the same app.
  • When you need full transparency over how data changes.
  • When debugging or time-travel inspection is valuable.

Strengths

  • Predictable State Flow: Every change is triggered through explicit actions, ensuring clarity.
  • Scalable Architecture: Ideal for big teams and long-term projects.
  • Debugging Tools: Powerful DevTools for replaying and visualizing state transitions.
  • Testability: Reducers and effects can be easily tested in isolation.
  • Community Support: A large, mature ecosystem with well-documented best practices.

Limitations

  • Learning Curve: Requires understanding of actions, reducers, and effects.
  • Boilerplate Code: Can feel verbose, especially for small applications.
  • Overhead: May add unnecessary complexity if your app is simple.

In short: NgRx is best for large-scale, mission-critical applications where predictability, auditability, and strict data flow are essential.

4. Akita — Balanced Simplicity and Structure

Akita offers a more lightweight, developer-friendly alternative to NgRx. It provides structured state management with far less boilerplate and complexity. Akita organizes state into stores and queries, simplifying reactive data management without losing scalability.

It’s ideal for teams that need structure and reactivity but find NgRx too heavy.

When to Use Akita

  • For mid-sized to large applications that are growing fast.
  • When your team values clarity and simplicity but still needs predictable state handling.
  • When performance and developer experience are priorities.

Strengths

  • Less Boilerplate: Streamlined setup compared to NgRx.
  • Reactive and Clean: Built on RxJS with intuitive APIs.
  • Modular Stores: Each store manages its own state slice, keeping the architecture organized.
  • High Performance: Efficient updates and smart reactivity mechanisms.
  • Easy Onboarding: Simpler learning curve for new developers.

Limitations

  • Smaller Ecosystem: Fewer tutorials, tools, and community support than NgRx.
  • Not a Standard: Fewer formal guidelines for large teams compared to NgRx.
  • Requires RxJS Understanding: Still needs familiarity with reactive programming.

In short: Akita is a middle ground — simpler than NgRx but more structured than services. It’s ideal for teams that want productivity without sacrificing maintainability.

5. Comparing the Three Approaches

Here’s how to think about the trade-offs without diving into technical jargon:

  • Angular Services are great when you need something fast, local, and simple. They’re perfect for small apps, internal tools, or isolated features.
  • Akita hits the sweet spot for mid-sized projects — strong structure, less code, and easier adoption. It’s particularly useful for startups or teams scaling up an existing app.
  • NgRx is the enterprise powerhouse — strict, explicit, and scalable. It’s ideal for complex systems where data accuracy and predictability cannot be compromised.

Each approach serves a purpose; none is universally “better.” The right choice depends on your project complexity, team size, and long-term maintenance goals.

6. Hybrid Strategies in Real Projects

Many mature Angular teams adopt a hybrid approach, combining these methods strategically:

  • Use Angular Services for small, isolated feature modules or ephemeral UI states.
  • Use Akita or NgRx for shared global data such as authentication, user profiles, or configuration settings.
  • Keep transient data (like form states or temporary filters) within components to avoid unnecessary global management.

This balanced approach lets you scale efficiently — keeping things simple where possible and structured where necessary.

7. Key Takeaways

  • For small applications or local state, stick with Angular Services.
  • For growing applications, adopt Akita to add structure and scalability.
  • For large enterprise systems, choose NgRx to ensure predictability, maintainability, and robust debugging.
  • Don’t over-engineer — complexity should grow with your application, not ahead of it.
  • Always document your chosen approach and standardize it across teams to ensure consistency.

Conclusion

State management in Angular is not about choosing the flashiest library — it’s about selecting the right balance between simplicity and structure.

  • Services give freedom and agility for small, focused apps.
  • Akita provides flexibility with structure for fast-growing products.
  • NgRx delivers enterprise-grade control, traceability, and long-term reliability.

The best Angular teams know when to use each tool — and more importantly, how to evolve their architecture as their application and business scale.

A well-chosen state management strategy doesn’t just manage data — it empowers developers to build cleaner, faster, and more maintainable Angular applications that can stand the test of time.

Angular for Enterprise: Crafting Scalable Frontends for Your .NET Backends

Modern enterprises demand web applications that are not only rich in functionality but also maintainable, performant, and scalable across teams and time. While ASP.NET Core powers secure, reliable, and high-performance backends, Angular has emerged as the go-to framework for building robust, modular, and enterprise-grade frontends.

When paired, Angular and .NET Core form a powerhouse full-stack ecosystem — enabling organizations to build scalable solutions with unified architecture, clean APIs, and long-term maintainability.

1. Why Angular is Built for Enterprise

Angular’s design philosophy centers on structure, scalability, and consistency, all of which align perfectly with enterprise development requirements.

Key Enterprise Strengths:

  • Component-Based Architecture: Angular applications are built using reusable, self-contained components. This structure promotes modular development, making it easier to maintain, test, and extend applications as they grow.
  • TypeScript Integration: Angular is written in TypeScript, providing compile-time type checking, strong tooling support, and better maintainability — critical for large teams working on complex applications.
  • Opinionated Yet Flexible Framework: Angular’s “batteries-included” approach gives enterprises a standardized way to build applications — with built-in solutions for routing, forms, validation, dependency injection, and state management.
  • Long-Term Support (LTS): Google’s structured release schedule and LTS policy make Angular a safe, stable choice for large organizations that need predictable updates and security patches.

2. Architecture That Scales

Angular naturally supports scalable architectures by enforcing a clear separation of concerns between presentation, business logic, and data access layers.

Key Architectural Practices:

  • Feature Modules: Break large applications into logical modules, making them easier to maintain, lazy-load, and optimize.
  • Shared and Core Modules: Centralize reusable components and singleton services for cleaner organization.
  • Dependency Injection (DI): Built-in DI allows seamless management of shared services, promoting cleaner architecture and testability.
  • Lazy Loading and Route Optimization: Load only what’s needed to boost performance and scalability across large apps.

This modular structure is what allows Angular to scale seamlessly from small projects to enterprise-grade systems with hundreds of screens and contributors.

3. Advanced State Management with NgRx

Managing state consistently across large applications is one of the most challenging aspects of frontend engineering. NgRx, Angular’s reactive state management library inspired by Redux, offers a robust solution.

Why Enterprises Use NgRx:

  • Predictable State Flow: Centralized store with a unidirectional data flow ensures that all state changes are explicit and traceable.
  • Improved Debugging: Time-travel debugging and action logging simplify troubleshooting complex UI behaviors.
  • Performance Efficiency: Smart change detection and on-demand state updates help maintain responsiveness in large applications.
  • Integration with RxJS: NgRx builds on Angular’s reactive programming model, allowing asynchronous operations and event streams to be handled elegantly.

With NgRx, teams can build applications that remain consistent, testable, and maintainable — even as they scale across multiple teams and modules.

4. Seamless Integration with ASP.NET Core Web APIs

Angular and ASP.NET Core complement each other perfectly in full-stack enterprise development.

Why the Integration Works So Well:

  • Consistent JSON-based Communication: Both technologies natively use JSON, allowing smooth data exchange between frontend and backend.
  • Cross-Origin Resource Sharing (CORS): ASP.NET Core easily handles CORS policies, enabling secure communication between Angular and API endpoints.
  • Authentication and Authorization: Angular can consume ASP.NET Core’s JWT or OAuth 2.0-based authentication seamlessly, ensuring robust identity management.
  • Shared Models and Validation: TypeScript interfaces can mirror C# models, reducing duplication and ensuring data integrity across layers.
  • Tooling Support: The .NET SDK provides Angular project templates, simplifying the setup of full-stack applications.

The combination creates an end-to-end TypeScript + C# pipeline, blending the productivity of Angular with the reliability of .NET’s backend infrastructure.

5. Developer Productivity and Team Collaboration

Enterprises thrive on collaboration — and Angular is designed for team productivity at scale.

  • Consistent Project Structure: Angular CLI enforces a standard directory structure, making it easy for new developers to onboard quickly.
  • Strong Tooling Ecosystem: VS Code, Visual Studio, and browser extensions integrate tightly with Angular and .NET for debugging, profiling, and performance analysis.
  • Testing Built-In: Angular’s support for unit testing (Jasmine/Karma) and end-to-end testing (Protractor/Cypress) encourages test-driven development, a hallmark of enterprise-quality applications.
  • Reusable UI Libraries: Enterprises can build and share internal component libraries across projects, maintaining visual consistency and UX standards.

Together, Angular and .NET empower teams to deliver features faster while maintaining long-term quality.

6. Real-World Enterprise Benefits

Organizations adopting the Angular + .NET stack report consistent advantages:

  • Unified Development Experience: Backend and frontend teams work in parallel with clear API contracts.
  • High Maintainability: Modular design and TypeScript reduce regression issues and simplify refactoring.
  • Robust Security: Built-in mechanisms for form validation, sanitization, and secure API interaction.
  • Performance and Scalability: Angular’s ahead-of-time compilation (AOT), lazy loading, and tree-shaking reduce load times and improve performance.
  • Longevity: Both frameworks have strong community and corporate backing (Microsoft and Google), ensuring longevity and support.

7. Ideal Use Cases for Angular + .NET

This stack is particularly suited for:

  • Enterprise dashboards and analytics platforms
  • ERP, CRM, and HR management systems
  • E-commerce and logistics management portals
  • Financial and insurance systems with strict security and performance requirements
  • Multi-team, long-term projects requiring maintainability and consistency

Conclusion

Angular’s robust, opinionated framework — combined with ASP.NET Core’s powerful backend — creates a full-stack architecture that’s tailor-made for enterprise-scale solutions.

Together, they offer a unified development experience: structured, maintainable, secure, and future-ready.

For enterprises building the next generation of digital platforms, the Angular + .NET combination isn’t just a stack — it’s a strategy for long-term success.

gRPC vs. REST for Microservices: A Performance and Design Comparison in .NET

When designing microservice-to-microservice communication in a .NET ecosystem, the choice between gRPC and REST is one of the most impactful architecture decisions you’ll make. Both approaches are widely used, but they differ sharply in performance characteristics, API design style, tooling, interoperability, and operational trade-offs. This guide breaks those differences down and helps you pick the right tool for each scenario.

A quick primer — what each technology is

  • REST (Representational State Transfer): An architectural style that typically uses HTTP/1.1, human-readable payloads (JSON), and resource-oriented URIs. It’s text-based and highly interoperable with web clients, browsers, and HTTP tooling.
  • gRPC: A high-performance Remote Procedure Call framework that runs over HTTP/2 and uses Protocol Buffers (binary serialization). It supports unary calls, client/server streaming, and bi-directional streaming and is engineered for low latency and compact payloads.

Performance: throughput, latency, and payload size

  • Latency: gRPC generally delivers lower latency than REST because of HTTP/2 multiplexing, header compression, and compact binary payloads. For high-frequency, low-latency RPCs between services, gRPC is often noticeably faster.
  • Throughput: gRPC typically achieves higher throughput due to smaller message sizes and fewer CPU cycles spent serializing/deserializing text JSON payloads.
  • Bandwidth and payload size: Protocol Buffers are much more compact than JSON, which reduces network usage — important in constrained networks or when sending lots of small messages.
  • Real-world caveat: Absolute numbers depend on message sizes, server/client hardware, network conditions, and specific implementations. Always measure using representative workloads. Profiling and benchmarking in your environment should drive final decisions.

API design style and developer experience

  • REST (resource-oriented):
  • gRPC (RPC-oriented):

Interoperability and client support

  • REST:
  • gRPC:

Streaming and real-time communication

  • REST can emulate streaming using long-polling, Server-Sent Events (SSE), or WebSockets, but these are additional technologies with their own trade-offs.
  • gRPC provides first-class support for client streaming, server streaming, and bidirectional streaming out of the box — ideal for real-time telemetry, streaming logs, chat, pipelines, and backpressure-aware flows.

Contract safety and schema evolution

  • gRPC / Protocol Buffers:
  • REST / JSON:

Tooling, observability and debugging

  • REST:
  • gRPC:

Security and transport considerations

  • REST:
  • gRPC:
  • Note: For internal microservices, you may also layer service mesh mutual TLS (e.g., Istio, Linkerd) regardless of REST or gRPC choice.

Deployment and operational concerns

  • Proxy and load balancer behavior:
  • Caching:
  • Compatibility with existing infra:

Scalability and resource usage

  • gRPC typically uses less CPU and network per RPC due to binary serialization and HTTP/2 efficiencies, which can reduce cost at scale.
  • REST benefits from statelessness and CDN caching for read-heavy workloads, which can also scale well and offload backend services.

When to choose gRPC (ideal use cases)

  • High-performance internal microservice communication where low latency and high throughput matter.
  • Streaming scenarios: telemetry, event ingestion, live feeds, and bi-directional pipelines.
  • Strongly-typed service contracts and strict schema evolution are required.
  • Polyglot microservices where teams can standardize on gRPC libraries.
  • Controlled environments where you manage client libraries and runtime stacks (server-to-server).

When to choose REST (ideal use cases)

  • Public-facing APIs, partner integrations, or browser-first clients.
  • When human-readability, easy debugging, and simple curl/browser testing matter.
  • When caching with CDNs and HTTP semantics is a major performance lever.
  • If your infrastructure or proxies lack mature HTTP/2 support and upgrading is not an option.
  • For teams that prefer resource-oriented design and loose coupling with many external consumers.

Hybrid patterns: best of both worlds

  • Expose gRPC internally, REST externally: Keep high-performance gRPC between services, and expose REST/JSON endpoints to external clients or partners via an API gateway or an adapter layer.
  • gRPC + gRPC-Web: If you want the performance of gRPC but also need browser compatibility, use gRPC-Web (via proxy) to allow browsers to call gRPC services.
  • Wrap or translate: Use a facade service that translates between REST and gRPC as a migration strategy or when supporting diverse clients.

Migration & practical advice for .NET teams

  • Measure first: Profile real workloads and latency patterns. Don’t assume gRPC is always faster for your specific payloads.
  • Start small: Pilot gRPC for a latency-sensitive service or adopt it in new services rather than doing a big-bang migration.
  • Design contracts carefully: Use Protobuf’s best practices when using gRPC and enforce schema governance.
  • Plan observability: Ensure logging, tracing, and metrics cover gRPC metadata, request sizes, and streaming lifecycles.
  • Check infra compatibility: Validate load balancers, API gateways, and service meshes support HTTP/2 and streaming before committing.
  • Consider developer experience: gRPC offers compile-time safety and generated clients that speed development; provide onboarding docs and tooling for teams.

Decision checklist (short)

  • Do you require low latency and high throughput between services? → lean gRPC.
  • Do you need browser-native support and broad third-party interoperability? → choose REST.
  • Is streaming or bi-directional communication important? → gRPC is likely better.
  • Will caching via CDNs be a primary optimization? → REST typically fits better.
  • Can you control and upgrade infrastructure to support HTTP/2? → gRPC becomes viable.
  • Do you want strongly-typed contracts and code generation? → gRPC + Protobuf is attractive.

Conclusion

There’s no universal winner. gRPC shines for internal, performance-sensitive, and streaming scenarios; REST remains the best choice for public, browser-compatible, and highly discoverable APIs. Many successful .NET microservice architectures use both: gRPC for efficient internal service-to-service calls and REST for external-facing endpoints. Make the choice based on measurable performance goals, client compatibility needs, operational readiness, and developer ergonomics — and validate with benchmarks in your environment.

API Versioning Strategies in ASP.NET Core: Choosing the Right Approach

API versioning is essential for any public or long-lived API. It lets you evolve features and fix problems without breaking existing clients. This guide compares four common versioning methods — URL path, query string, header, and media type — and helps you choose the right strategy for your API’s lifecycle.

URL Path Versioning (e.g., /v1/…)

What it is: The version is embedded in the path of the endpoint.

Pros

  • Extremely visible and discoverable for clients.
  • Works cleanly with caching, CDNs, and proxies.
  • Simple to test and debug; routing is straightforward.

Cons

  • Can lead to duplicated endpoints across versions and extra maintenance.
  • Ties resource identifiers to version numbers, which some consider less pure REST design.
  • Clients must change URLs to move to a new version.

Best for: Public APIs, heavy use of CDNs, or scenarios where explicit client control and discoverability matter.

Query String Versioning (e.g., ?v=1)

What it is: The version is supplied as a query parameter on the endpoint.

Pros

  • Keeps the base resource path stable.
  • Easy to opt-in to a different version without changing URL structure.
  • Good for feature toggles and testing alternate behaviors.

Cons

  • Slightly less visible than path-based versioning.
  • Some caching layers treat query strings differently, which can complicate caching.
  • Less REST-pure since resource identity is decoupled from representation.

Best for: Internal APIs, gradual rollouts, or situations where maintaining stable base URIs is desirable.

Header-Based Versioning (e.g., Api-Version header)

What it is: The client specifies the API version in a request header.

Pros

  • Keeps URLs clean and resource-focused.
  • Separates transport/routing concerns from version negotiation.
  • Useful when versioning is primarily an operational matter.

Cons

  • Less discoverable to humans and intermediate systems.
  • Some clients and tools make custom headers harder to set or inspect.
  • Requires more server-side negotiation and careful documentation.

Best for: B2B or internal APIs where clients can reliably set headers and you want stable URIs.

Media Type Versioning (Content Negotiation)

What it is: The version is encoded in the media type used for content negotiation.

Pros

  • Fully leverages HTTP content negotiation semantics.
  • Separates resource identity from representation changes.
  • Allows fine-grained control over representations.

Cons

  • Complex to implement and document correctly.
  • Some intermediaries and client tooling may not handle custom media types well.
  • Harder for humans to discover without clear documentation.

Best for: Mature public APIs where representation-level evolution is a strategic need and clients are sophisticated.

How Versioning Choices Affect Clients and Operations

  • Discoverability: Path-based versions are easiest for humans to spot; headers and media types are more opaque.
  • Caching and CDNs: URL path and query string are generally cache-friendly; header and media-type strategies require explicit cache configuration.
  • Client Simplicity: Path and query string are simplest for a broad range of client types; header and media-type approaches need clients able to set headers and negotiate content.
  • Backward Compatibility: Any approach can be designed for compatibility; the real difference is how effortless it is for clients to migrate to newer versions.
  • Operational Complexity: Header and media-type strategies add routing and negotiation complexity on the server; path and query are straightforward to implement and log.

Practical Recommendations

  1. Public API with many external consumers Prefer path-based versioning for clarity, discoverability, and cache friendliness. Publish migration guides and deprecation timelines.
  2. Internal API with trusted clients Query string or header-based versioning adds flexibility while keeping base URIs stable.
  3. APIs focused on representation changes Use media type versioning when the representation itself evolves and content negotiation is central.
  4. Hybrid strategies Consider combining approaches: use path-based versioning for major breaking changes, and headers for experimental or minor feature flags.
  5. Tooling and client constraints If clients are often simple (browsers, lightweight SDKs), favor path or query-based approaches. If you rely on CDNs, prefer path/query for predictable caching.

Versioning Best Practices (applies regardless of approach)

  • Document everything clearly. Provide change logs, migration instructions, and examples for each version.
  • Treat major versions as breaking changes. Use minor versions for backward-compatible additions and enhancements.
  • Support co-existence. Keep older versions available during migration windows and communicate deprecation schedules well in advance.
  • Automate compatibility tests. Use contract testing or integration tests to detect breaking changes before release.
  • Provide client helpers. Offer SDKs, sample clients, or migration scripts to simplify adoption for consumers.
  • Default behavior. When no version is supplied, return a documented default and consider including a header that indicates the current stable version.
  • Deprecation policy. Publish predictable timelines for retirement of versions and stick to them.

Final Thoughts

There’s no one-size-fits-all answer to API versioning. The best choice depends on your audience, tooling, caching needs, and how you expect the API to evolve. Path-based versioning is often best for wide public consumption, while header/query methods can offer flexibility for internal or controlled ecosystems. Media type versioning is ideal when representation negotiation is a strategic priority.

Make versioning part of your API design from day one. Good versioning practices protect your users from breaking changes, enable safe evolution, and reduce long-term maintenance costs.

Securing Your ASP.NET Core Web APIs: A Deep Dive into JWT & OAuth 2.0

APIs are the gateway to your application’s data and capabilities — and with that comes responsibility. Two standards dominate modern API security: JSON Web Tokens (JWT) for stateless authentication and OAuth 2.0 for delegated authorization. Used together (or independently when appropriate), they enable scalable, secure identity and access control for ASP.NET Core Web APIs.

This guide explains the concepts, how they fit together, and practical best practices for production-ready API security — no code required.

1. Authentication vs Authorization — the quick distinction

  • Authentication answers “Who are you?” — confirming identity. JWT is commonly used here.
  • Authorization answers “What can you do?” — controlling access to resources. OAuth 2.0 handles delegated authorization and scopes.

Understanding both is essential: authentication provides a token that proves identity; authorization decides which operations that identity may perform.

2. JWT — what it is and when to use it

JSON Web Token (JWT) is a compact, URL-safe token format that encodes claims (user id, roles, expiry, etc.) and is digitally signed.

Why JWT:

  • Stateless: server doesn’t need to store session state — ideal for horizontally scaled services.
  • Compact & portable: easy to send in HTTP headers.
  • Interoperable: supported across languages and platforms.

When to prefer JWT:

  • Microservices or distributed APIs where keeping server-side session state is undesirable.
  • Single Page Apps, mobile clients, or services that need short-lived, verifiable tokens.
  • When you want the token to carry claims usable by downstream services without extra lookups.

Caveats:

  • Tokens are self-contained; if you put too much sensitive data in them, you risk exposure.
  • You must plan for token revocation and rotation since a JWT is valid until it expires (unless you implement revocation patterns).

3. JWT anatomy and security considerations (high level)

A JWT typically has three parts: header, payload (claims), and signature. Important considerations:

  • Signing: Tokens must be signed — either with a symmetric key (HMAC) or an asymmetric pair (RSA/ECDSA). Asymmetric keys provide stronger security and easier rotation across services.
  • Claims: Keep them minimal. Include only what consumers need (e.g., subject, roles, issued/expiry times, audience).
  • Expiry (exp claim): Use short-lived access tokens (minutes). This reduces the risk if a token is leaked.
  • Refresh tokens: Use refresh tokens to obtain new access tokens without forcing frequent logins. Store refresh tokens securely (usually server-side or in a secure, limited-scope storage).
  • Audience and issuer: Validate aud (who the token is for) and iss (who issued it) to prevent token replay across different systems.
  • Transport: Always serve tokens over HTTPS to prevent interception.
  • Storage on clients: Avoid storing access tokens in insecure places (e.g., local storage in browsers) unless mitigations are in place; consider secure, HttpOnly cookies or browser-specific best practices and protections (e.g., same-site cookies, CSRF protections).
  • No sensitive secrets in payload: Never include passwords or secrets in JWT claims — they are base64-encoded, not encrypted, unless you use encrypted JWT (JWE), which is less common.

4. OAuth 2.0 — the right tool for delegated access

OAuth 2.0 is an authorization framework designed for delegating limited access to protected resources. It defines roles and flows:

  • Roles: Resource Owner (user), Client (app), Authorization Server (auth provider), Resource Server (API).
  • Common flows:

OAuth 2.0 gives you:

  • Scopes: fine-grained permissions (e.g., read:orders, write:orders).
  • Delegation: allows third-party apps to act on behalf of users without sharing credentials.
  • Standardized token lifecycle: access tokens (short-lived) + refresh tokens.

Use OAuth when:

  • Third-party apps or services need delegated access.
  • You want a standardized way to issue tokens, manage scopes, consent screens, and revocation.

5. How JWT and OAuth 2.0 work together

A common pattern is:

  1. Authorization Server (OAuth provider) authenticates user and issues an access token (often a JWT) and a refresh token.
  2. Client presents the access token to the Resource Server (your ASP.NET Core API).
  3. Resource Server validates the token and checks claims / scopes to authorize the request.

This separation lets you centralize authentication and authorization decisions (on the Authorization Server) while keeping Resource Servers focused on validating tokens and enforcing policies.

6. Token validation and authorization policies in ASP.NET Core (conceptual)

When your API receives a request with a token, it should:

  • Validate signature: ensure token was issued by a trusted authority.
  • Validate exp: reject expired tokens.
  • Validate audience/issuer: confirm token is meant for your API.
  • Verify scopes/claims: ensure the token has required permissions (scopes) or roles.
  • Enforce fine-grained policies: map claims to authorization requirements (e.g., role-based access, resource ownership checks, claim-based rules).

Authorization policies let you express rules like:

  • “Only users with the admin role can access this endpoint.”
  • “Users can read their own orders but not others’.”

Policies should be declarative and applied consistently across endpoints.

7. Refresh tokens, rotation, and revocation

Short-lived access tokens reduce risk, but users still need a smooth experience. Use refresh tokens to obtain new access tokens. Best practices:

  • Rotate refresh tokens: issue a new refresh token each time one is used; invalidate previous one. This reduces risk from stolen refresh tokens.
  • Protect refresh tokens: treat them as highly sensitive credentials. Store them securely and limit their lifetime and scope.
  • Revoke on suspicious activity: support token revocation (via blacklist or introspection endpoint) for compromised credentials or logout events.

Token revocation is harder with pure stateless JWTs; typical solutions:

  • Maintain a revocation list/blacklist (short-lived entries).
  • Use a token introspection endpoint on the Authorization Server.
  • Use short access token lifetimes and rely on refresh token controls.

8. Additional hardening and operational best practices

Secure transport and headers

  • Always use HTTPS.
  • Apply security headers (CSP, HSTS, X-Frame-Options) as appropriate.

CORS and CSRF

  • Configure CORS strictly to allow only required origins.
  • If you use cookies for tokens, defend against CSRF with anti-forgery measures.

Secret & key management

  • Use a secure secrets store (Key Vault, AWS Secrets Manager) for signing keys and client secrets.
  • Rotate keys regularly and support key identifiers (kid) so older tokens can still be validated after rotation.

Rate limiting and throttling

  • Apply rate limits to protect APIs from abuse and DDoS.
  • Combine with IP-based protections and WAF if needed.

Logging, auditing & observability

  • Log authentication/authorization events (success/failure) without logging raw tokens.
  • Capture metrics: token validation failures, expired token rates, failed logins.
  • Use centralized monitoring and alarms for suspicious spikes.

Least privilege & minimal scopes

  • Issue tokens with the smallest scope necessary for the operation.
  • Enforce least privilege in APIs and resource access.

Defense-in-depth

  • Combine multiple layers: transport security, token validation, authorization policies, input validation, and monitoring.

9. Common mistakes & how to avoid them

  • Long-lived access tokens — increase exposure window. Use short-lived access tokens and refresh tokens with controls.
  • Storing tokens insecurely on clients — use platform-specific secure storage.
  • Failing to validate aud or iss — allows tokens intended for other resources to be used.
  • Embedding sensitive data in JWT claims — anyone with token can read claims unless encrypted.
  • No key rotation plan — makes compromise long-lasting.
  • Mixing authentication and authorization logic on the server — keep roles, claims, and policies clear and documented.

10. Deployment & production checklist (quick)

  1. Enforce HTTPS site-wide.
  2. Short-lived access tokens + secure refresh tokens.
  3. Validate signature, expiry, audience, and issuer on every request.
  4. Store signing keys in a secure vault and rotate keys regularly.
  5. Implement authorization policies for role/scope checks.
  6. Use PKCE for public clients (mobile/SPAs).
  7. Rate limit endpoints and enable global throttling.
  8. Add logging/monitoring and alerting for auth anomalies.
  9. Document token usage, scopes, and token lifecycles for your consumers.
  10. Test token revocation, expiry behavior, and edge cases before production.

11. Final thoughts

Securing ASP.NET Core Web APIs with JWT and OAuth 2.0 gives you a modern, scalable, and interoperable security architecture — when implemented thoughtfully. The keys to success are:

  • Treat tokens as sensitive credentials.
  • Use short-lived access tokens and secure refresh token strategies.
  • Centralize authentication with an Authorization Server and enforce fine-grained authorization in your APIs.
  • Protect keys, rotate them, and monitor auth events continuously.

When done right, JWT + OAuth 2.0 enables secure, decoupled systems that scale with confidence while offering a smooth user experience.